Highlight & Contour for Round Faces (Slimming Makeup Tricks That Work)
If you’ve ever tried contouring and ended up looking more like you were wearing face paint than a subtle, sculpted goddess, you’re not alone. For those of us with round faces, highlighting and contouring can be game-changing, but only if you place the product in the right spots. This guide will walk you through exactly how to highlight & contour for round faces for dimension and definition — plus the common mistakes to avoid.
Understanding a Round Face Shape
Round faces tend to:
- Be equal in length and width.
- Have softer angles and fuller cheeks.
- Lack a sharply defined jawline.
The goal with contouring? Create shadows where you want definition and light where you want lift.

Step 1: Prep Your Canvas
Start with:
- Moisturizer: prevents patchiness.
- Primer: smooths texture and helps makeup last longer.
- Foundation: start with having two different shades, one that is a bit lighter than your natural skin tone, and one that’s a tad bit darker. By using these two shades, it’ll already give your face more depth rather than a solid canvas to work with. Use the darker foundation on the outer parts of your face, and the lighter foundation on the areas you’d use to highlight in the center.
Step 2: Choose the Right Products
Contour:
- Creams blend seamlessly for a natural finish.
- Choose a shade 1–2 tones deeper than your skin tone with a neutral or slightly cool undertone.
Highlight:
- Use a concealer 1–2 shades lighter than your skin tone.
- Opt for a liquid or cream for subtle blending.
Pro Tip: Powder contour is great for setting but can look harsh on its own.
Step 3: Where to Contour a Round Face
- Sides of the Forehead: Slims the top of the face.
- Under the Cheekbones: Place product slightly above the hollow for a lifted effect.
- Jawline: Adds definition and prevents the face from looking bottom-heavy.
Start with your contour shade. This is the step that’s going to sculpt your face. Don’t apply too much product or over blend. Areas to apply your contour shade is along the hollows of your cheeks, chin, jawline, and sides of your nose. If you want to make your forehead appear smaller, add it to the sides of your temples as well. These shadows will push back your face and will help create the appearance of a more defined face.
Follow up with a warm bronzer to warm up your face. Give yourself a bit of a bronzed glow just around your face.
Avoid: Contouring too low since it drags the face down.
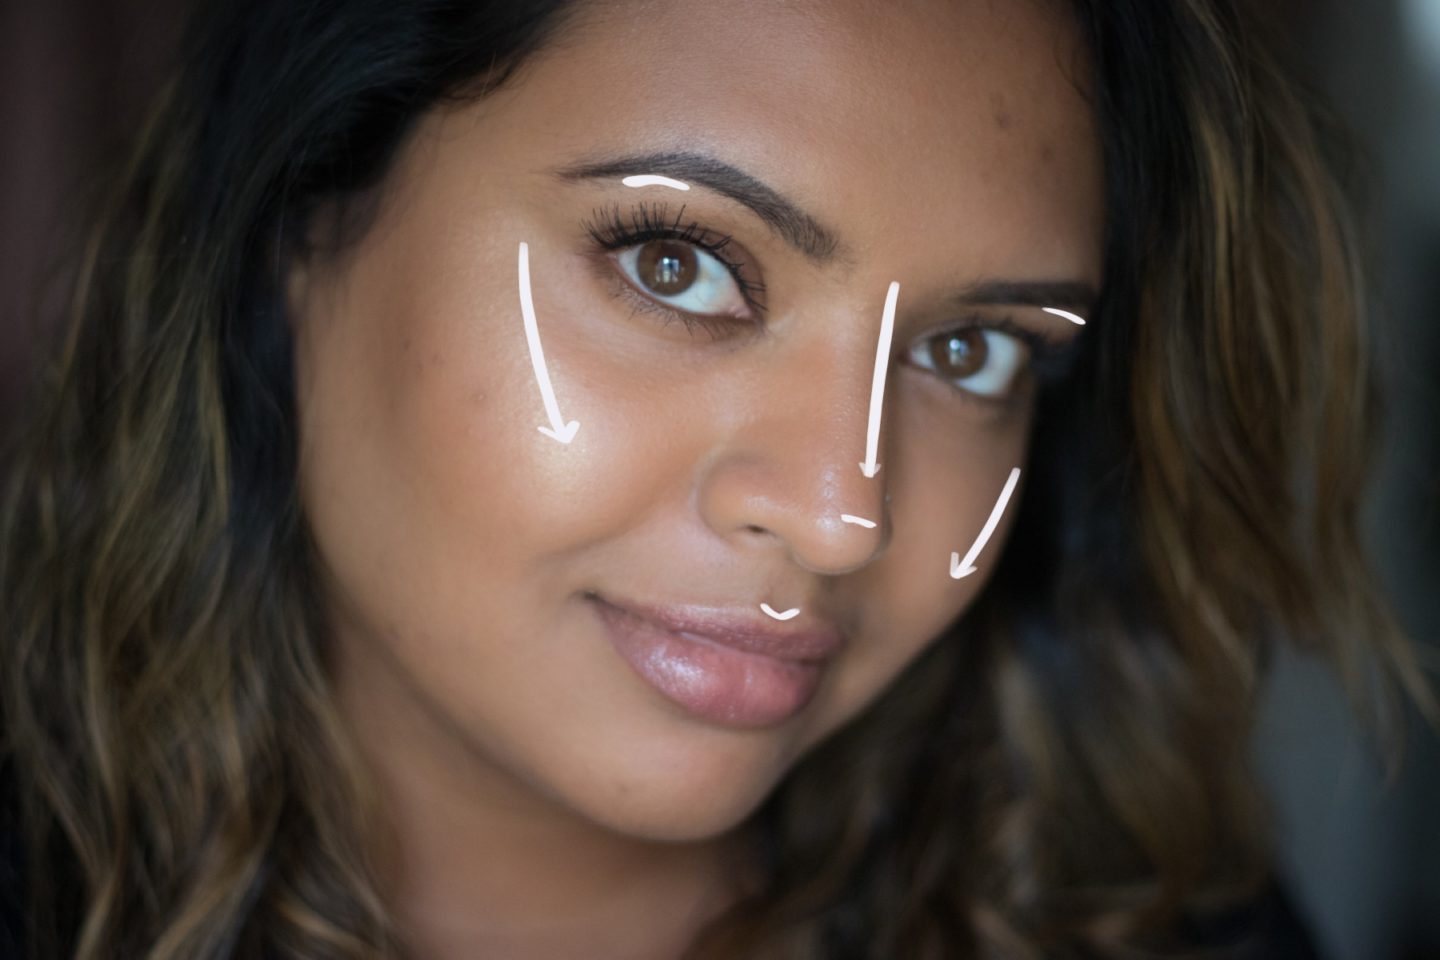
Step 4: Where to Highlight
- Center of the Forehead: Adds brightness and elongates.
- Under the Eyes (thin triangle shape): Lifts the cheeks.
- Bridge of the Nose: Creates length.
- Chin Center: Balances the face shape.
Grab a concealer that is one to two shades lighter than your skin tone, and apply it under your eyes, bridge of your nose, a bit on your forehead, and your chin. The key to this is to not pull your concealer too wide, rather pull it lower. All of the highlighted areas should be closer to the center of your face. Once you blend it out using a beauty blender, the center of your face will appear to be pulled forward.
Grab a powder concealer to add a little extra pop of sheen to your cheeks and the top of your nose.
Related Post: Easy, Natural Glowing Makeup
Step 5: Blend Like a Pro
- Use a damp beauty sponge for creams and liquids.
- Blend contour upwards to lift.
- Blend highlight by tapping — never dragging.
Step 6: Set It in Place
Set contour with a matching powder for all-day wear. Lightly dust with translucent powder in highlighted areas. The final step is to lock your look in with a setting spray. This will help prevent your makeup to move around or fade throughout the day.
Pro Mistakes to Avoid
- Forgetting to blend into the hairline and neck.
- Using shades that are too dark or too light.
- Over-contouring the nose (can make it look unnatural).
Related Post: How to Highlight a Round Face
Highlighting and contouring isn’t about changing your face — it’s about enhancing the beautiful features you already have. With the right placement and blending, your round face will have dimension, lift, and a natural glow.

Loved the video, you have such pretty skin! Have subscribed to you Yt channel 🙂
http://www.alifyalifestyle.com/
aaah thank you so much! <3